Table of Contents
If you’re interested in hatching peacock eggs, there are a few things you need to know. Incubating eggs takes time and patience, but it’s so rewarding to see those little peachicks hatch and grow into adults. In this article, you will learn the basics of incubating and hatching peacock eggs and everything you need to start.
Peacock eggs can be hatched either naturally or artificially. The natural method is not commercially viable as the peahen will be able to hatch only a limited number of eggs.
What do you need to hatch peacock eggs artificially?
Before you start incubating your peacock eggs, be sure to check that you have everything you need. This includes a functional incubator, fertile peacock eggs, a candler, a thermometer, and a hygrometer. By having everything you need beforehand, you can be sure that the incubation process will go smoothly.
1. Egg Incubator
If you want to successfully hatch peacock eggs, you’ll need an egg incubator. The Manna Pro Egg Incubator is a great option, especially if you’re on a budget. If you prefer to build your own incubator, we have a great post here that covers all the different options. Remember, as long as your incubator is thermostatically controlled and has the proper humidity, you’ll be all set!

2. Fertilized Peacock Eggs
One of the most important things you need for success is fertilized peacock eggs. It doesn’t matter whether you’re buying them or collecting them from your own flock – the goal is to get eggs that will hatch into healthy peachicks. Be sure to check that the eggs are fertile before you get started; an infertile egg will never hatch. The best way to tell if an egg is fertile is to candle it.
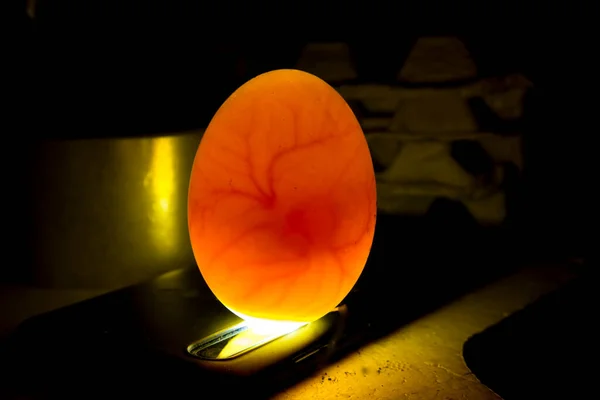
3. Candling Device
This is a piece of equipment that is used to check the fertility of peacock eggs. This is a vital device because you need to know if the eggs are fertile, infertile or dead.
If you want to check the fertility of your peacock eggs, you can purchase an egg candler online or at most farm supply stores. If you do not own one, you can hold the egg close to a bright light source and look inside the egg.
If you want to buy a peacock egg candler, we recommend the Brinsea Ovascope Egg Viewer.

Also Read: How to Candle Chicken Eggs + Candling Chart
How to Hatch Peacock Eggs with an Incubator
Before you begin the process of incubating peacock eggs, you need to know that peacock egg has an incubation period of 28-30 days. This means that it will take 28 to 30 days of incubation before peacock eggs will hatch into chicks. The process of hatching peacock eggs is very similar to the one used for hatching chicken eggs. Ready your incubator. Be sure it’s clean.
Peacock hens begin laying eggs in April and will lay eggs every other day until a clutch of 7-10 eggs is achieved. Keep the gathered hatching peacock eggs at room temperature, before placing them in the incubator.
Step 1: Obtain or collect healthy fertilized peacock eggs
The first step to incubating peacock eggs is to procure healthy, fertilized eggs. The best eggs for hatching are medium-sized; avoid eggs that are too small or too large. Select clean eggs without any cracks or holes.
Step 2: Choose an incubator
You have two main types of incubators to choose from: forced-air and still-air. Forced-air incubators are larger and have a fan, making them great for large numbers of eggs. Still-air incubators are smaller and don’t have a fan, so they’re better for fewer eggs. Most experts prefer forced-air incubators. Read this article to know which incubator suits your needs.
Step 3: Clean the incubator and place it in the ideal spot
You will want to clean your incubator thoroughly (very thoroughly) to ensure that any bacteria or contaminants are removed. Once the incubator is clean, you can then find a good spot for it. The best spots are where there are no temperature changes. Avoid placing the device near windows or next to refrigerators or heating vents or air conditioners, etc. Your incubator probably came with a hole in it for oxygen; make sure that the hole is not closed or covered up.
Step 4: Test the incubator
The most important part of using an egg incubator is making sure the temperature and humidity stay consistent. You can test your incubator by running it for 24 hours without eggs to see if the temperature and humidity levels remain stable. The incubator should be placed indoors in a room with good ventilation to ensure the eggs stay safe and healthy. Remember to also add water to the incubator when you first start it up.
Step 5: Position the eggs in the incubator
Place the fertile peacock eggs into the incubator. The temperature will naturally go down in the incubator for the first few hours. Do not adjust the temperature for the first 48 hours after placing the eggs. The incubation period is 28-30 days. Always set eggs with the small ends pointing downward and the larger end facing upward. This allows the developing embryo inside the egg to have room to breathe and prevents the yolk from sticking to the shell.
Step 6: Maintain a steady temperature and turn the eggs regularly
The incubation temperature for peafowl or peacock eggs is 99.5oF and 55-60% relative humidity. In order to ensure that the eggs develop properly, it is important to maintain a steady temperature and to regularly turn them. By doing so, you will avoid the yolk sticking to the shell.
Turn the hatching peacock eggs 180 degrees at least three times, daily. Turn them in an odd number of times each day, to be sure they don’t rest on the same side every night. Always wash your hands before coming into contact with the eggs and be sure to handle them gently and with care.
Step 7: Remove dead or spoilt eggs
Candle the eggs after one week and record any development. If after 10 days you see no growth in an egg, it probably isn’t fertile. Remove it, so that it doesn’t spoil and contaminate the incubator.
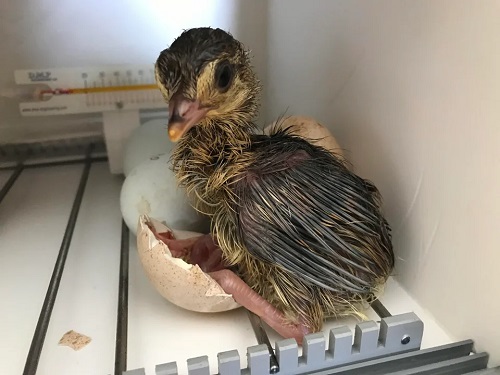
Step 8: Lock down and prepare for the hatch day
Stop turning the eggs on day 25 of incubation and increase the humidity to 70% by adding more water. From day 27, the egg should start to hatch, and this continues until day 28.
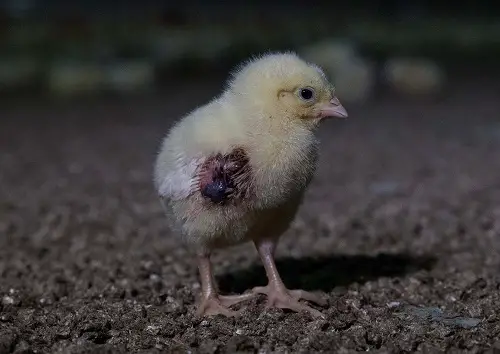
Prepare a place to keep your hatched chicks, prior to their arrival. Let the peacock chicks hatch out of their eggs on their own, whenever possible. When they are fully dry, move them to their prepared area.
Peafowl / Peacock Egg Incubation Chart
This peacock egg incubation chart is useful for people that want to hatch their peafowl eggs at home. This incubation chart shows the ideal temperature, humidity and turning frequency for each day of incubation. You can download the chart as a PDF file or print it.
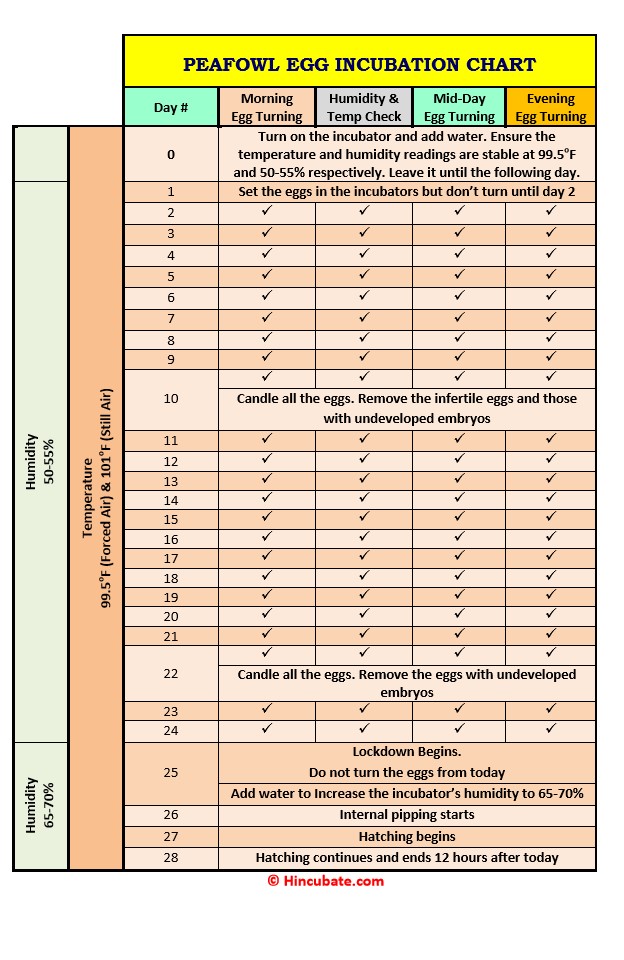
What are peacock egg hatching time, temperature and humidity?
The incubation period for peacock eggs is 28-30 days. The ideal incubation temperature and humidity are 99.5oF and 50-55% respectively. However, the humidity should be increased to 70% on the 25th day until the day of hatch.
How many eggs does a peacock lay?
A female peacock could lay a clutch of 7-10 eggs. The eggs should be gathered at room temperature, prior to placing them in the incubator.

You did not tell how to prep the egg before entry into hatcher.
You did not tell how to prep the egg before entry into hatcher.
Step 8: Prepare for the hatch day
Stop turning the eggs after 25 days and increase the humidity to 90 percent.
What are peacock egg hatching time, temperature and humidity?
The incubation time for peacock eggs ranges is 27-30 days. The ideal incubation temperature and humidity are 99-100oF and 55-60% respectively. However, the humidity should be increased to 70% on the 25th day until the day of hatch.
Seems that this post contradicts itself
Thanks for bringing this to my attention. The typo has been corrected.
I didn’t see the part where it said increase the humidity to 90% at hatch. If it did, that is not correct. Maintain 55 to 60 percent humidity until the 25 day, then move to hatcher and increase the humidity to 70 percent.
How to pray your eggs(small egg downwards) if your incubator is just flat.
What should be done?
Thank you!
The best solution is to use an egg tray.
How to pray your eggs(small egg downwards) if your incubator is just flat.
What should be done?
Thank you!
The best solution is to use an egg tray.
I think i did somthing rong … at first day instend of put them up side down i put them on the side … just before the end if first day in incubator i saw your post and i move them correctly… you think will damage my pecock eggs ??
No, it won’t.
I sure wish people would state the “correct” sex when talking about this breed of these birds. At times even Veterinarian’s STATE THEM WRONG!
They are all PEAFOWL!
Female birds are PEAHENS!
ONLY MALE birds are PEACOCKS!
And the hatched offspring are PEACHICKS!
Just one of my pet peeves!
You’re correct, but using Peacock gets many people and readers confused.