Table of Contents
The positioning and turning of eggs in an incubator significantly impact their hatchability. This is why hatchable eggs must be placed correctly inside the incubator and turned daily.
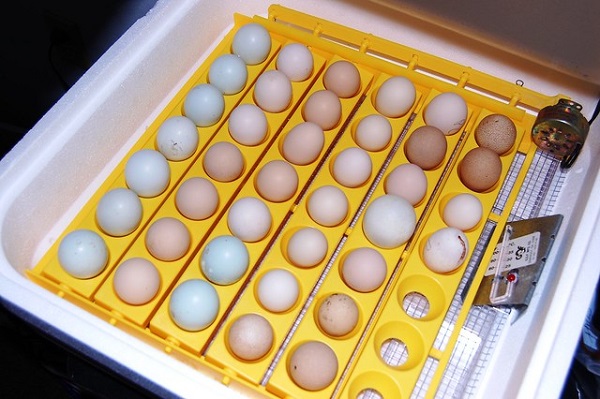
The correct positioning of eggs should be the large or blunt end facing up while the pointed end should sit on the tray (facing down). In an incubator with an egg turner, the eggs are placed vertically in egg-holding trays. In an incubator with no egg turner, the eggs are placed on a horizontal tray. However, care must be taken to keep the large, blunt end slightly higher than the pointed end.
Why are eggs turned during incubation?
During egg incubation, it is mandatory to turn the eggs either with a mechanical egg turner or manually with hands. Egg turning is one of the important daily tasks that must not be ignored or neglected if you want a successful hatch. The most critical time eggs need to be turned is during the first week of incubation.
Always wash your hands thoroughly before turning eggs, and again afterward, to avoid transferring bacteria to or from the shell.
Early embryo deaths and full-term chicks that fail to pip are consequences of not turning eggs properly. Some of the reasons for egg turning during incubation include:
- To even out the temperature in the egg
- To prevent the embryo from sticking to the shell membrane
- To move metabolic wastes away from the embryo
- To improve contact of the embryonic membrane with the albumen for enhanced access to the nutrients in the albumen.
Manual Egg Turning
In fully automatic egg incubators with an egg-turning device, egg turning is done automatically by the incubator at a preset interval. However, for incubators without an egg turner, egg turning has to be done manually. In this case, the eggs are turned 3-5 times per day.
Except you are available always to turn the eggs at regular intervals, ensure that the eggs are turned an odd number of times every day. This is to prevent the eggs from always lying on the same side overnight.
The eggs are to be turned from side to side and not end to end. This is why it is good to leave enough space in the incubator if using an incubator with no egg turner. The reserved space will allow you to roll the eggs half a turn in one direction and then at the next turning roll them half a turn back. If there is no space to roll the eggs, then you will have to lift and turn each egg. Of course, it is more exhausting and time-consuming and you could accidentally drop some eggs and break them. For more successful hatch and stronger hatchlings, ensure the large, blunt ends of the eggs are facing up all through incubation.
The eggs are to be turned halfway around. If turned in a complete circle, the allantois sac could break and the embryo will die. Marking the shell of the eggs is a safe way to ensure all eggs are turned each time and that they are turned halfway around. Use a soft pencil or marker to draw an O on one side of the egg and an X on the opposite side.
You need to open the incubator several times a day to turn the eggs. This reduces the relative humidity inside the incubator, which you must make up for. One way to do this is to spray the eggs with lukewarm water from a spray bottle. Depending on your incubator design, you might need to turn off the fan while turning the eggs so it does not dry them out by blowing air across them.
When to Stop Turning Eggs in the Incubator
Incubating eggs can be a rewarding and exciting experience, but it is important to know when to stop turning the eggs to ensure a successful hatch. Turning the eggs helps to evenly distribute the developing embryos and ensure that they are getting the right amount of oxygen and nutrients. However, as the hatching date approaches, it is essential to stop turning the eggs to allow the embryos to orient themselves and prepare for hatching.
The length of incubation varies depending on the species of the egg being incubated. Chicken eggs typically take 21 days to hatch, while other species, such as ducks and geese, may take longer. Most incubation instructions recommend stopping the turning of eggs 3 days before they are expected to hatch. This allows the embryos to get into the correct position for hatching and to start breaking out of their shells.
If you are using a hatcher or an incubator with a separate hatching tray, you should move the eggs to the hatcher or hatching tray 3 days before they are expected to hatch. This will provide the eggs with a stable and safe environment in which to hatch. Be sure to continue turning any eggs that remain in the incubator or on the turning trays that are scheduled to hatch at a later date.
In an incubator with a turning rack, it is not recommended to disconnect the turner and leave the eggs to hatch on the turning trays. This is because hatchlings can be quite active and may get tangled up in the rack and potentially twists or break a leg. Instead, it is best to move the eggs to a separate hatching tray or hatcher to provide a safe and stable environment for the hatchlings.
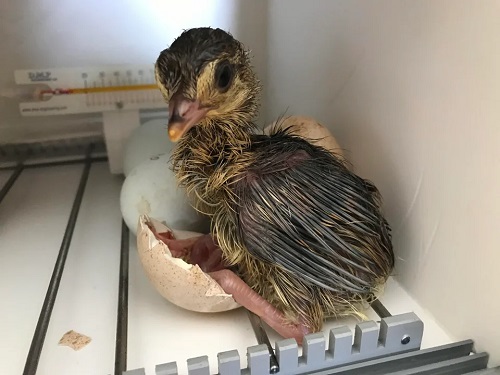
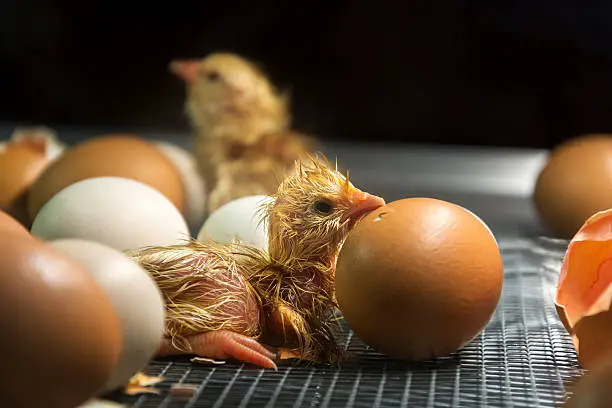
It is important to monitor the incubating eggs and check for signs of hatching. The eggs may start to rock and move as the hatchlings break out of their shells. Once the first hatchling has emerged, it is essential to provide warmth and humidity to support the hatchlings as they dry off and strengthen their muscles.
Overall, knowing when to stop turning eggs in an incubator is crucial for a successful hatch. By following incubation instructions and understanding the natural hatching process, you can ensure that your eggs have the best chance of hatching successfully.