Table of Contents
Have you ever wanted to hatch your quail eggs? It’s a fun and rewarding experience, and frankly, quail egg incubation is not as difficult as some beginners think. Quail eggs are a little different from chicken eggs, but the process of incubating and hatching them is similar. The main difference is that quail eggs are much smaller, so you’ll need to be careful not to break them.
In this article, we’ll give you a step-by-step guide on how to incubate and hatch the eggs of quail breeds like the Japanese or Coturnix, Bobwhite, Button and Gambel’s quails.
Step 1: Set up the incubator
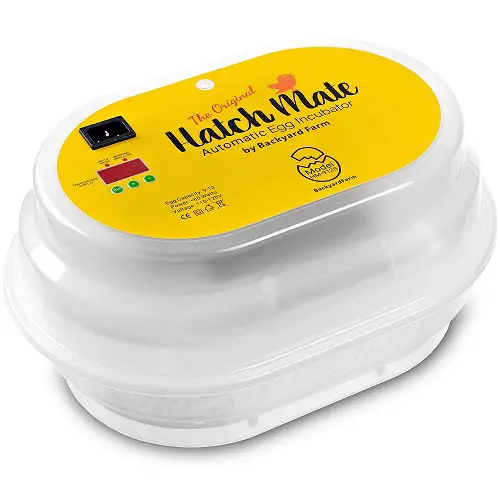
Since you intend to incubate your quail eggs artificially, you must have a good and reliable egg incubator. There are various kinds of pocket-friendly egg incubators for poultry small poultry breeders or enthusiasts on Amazon.
After getting the egg incubator, you must ensure that is it clean and free from debris or dirt. Put on the device and allow it to run continuously for at least 24 hours before setting the quail eggs. This is to allow the internal environment of the incubator to stabilize which includes reaching the correct temperature and humidity required for incubation. You will also be able to resolve issues and make necessary adjustments before setting the quail eggs.
Do not place the incubator in the following places:
- Near a window
- Where there is direct sunlight or draft
- Where there is a possible liquid spillage
- Near a vibrating machine
- Where it will be accessible to kids and pets
You should place the incubator in a room that maintains a stable temperature and is safe.
Step 2: Prepare the quail eggs
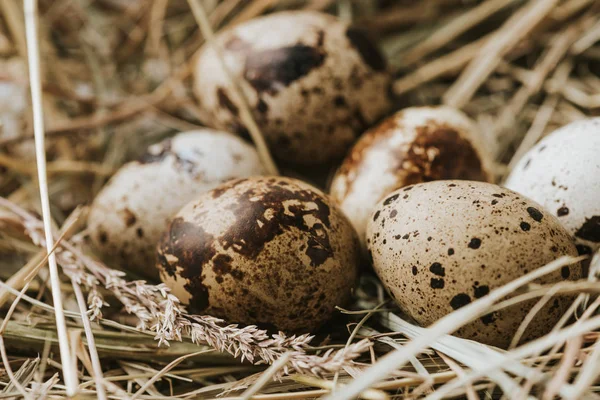
To achieve a high hatch rate, it is important to select healthy, fertilized and clean quail eggs. The following quail eggs should not be placed in the incubator:
- Extra-large, double-yolk and small quail eggs
- Non-fertilized eggs
- Dirty or soiled eggs
- Cracked or malformed eggs
It is best to candle the eggs to check for fertility. You can use a flashlight or purchase a special egg candler for this purpose. Always wash your hands before handling quail eggs or placing them in the incubator to prevent bacteria from contaminating the eggs and infecting the embryos. Make sure the eggs have been candled and kept at room temperature for at least 12 hours before setting them in the incubator.
Step 3: Set the quail eggs
Once you’ve confirmed that the incubator is working properly, you can proceed with setting the eggs. If your incubator comes with an egg tray, gently place the eggs on the tray, with the large end facing up and the small end resting on the egg tray.
To ensure that your egg turner is functioning properly, or to help identify which eggs have been turned and which have not, it is recommended that you mark both sides of the eggshell. This can be done by using a pencil to mark a plus (+) on one side and a minus (–) on the other side of the eggshell.
Monitor the temperature and humidity readings closely after you have set all the quail eggs. The incubator’s internal temperature may go down after all the eggs are set. This is normal as the eggs would first above some of the heat before the temperature returns to the right level.
Step 4: Turn the eggs at intervals
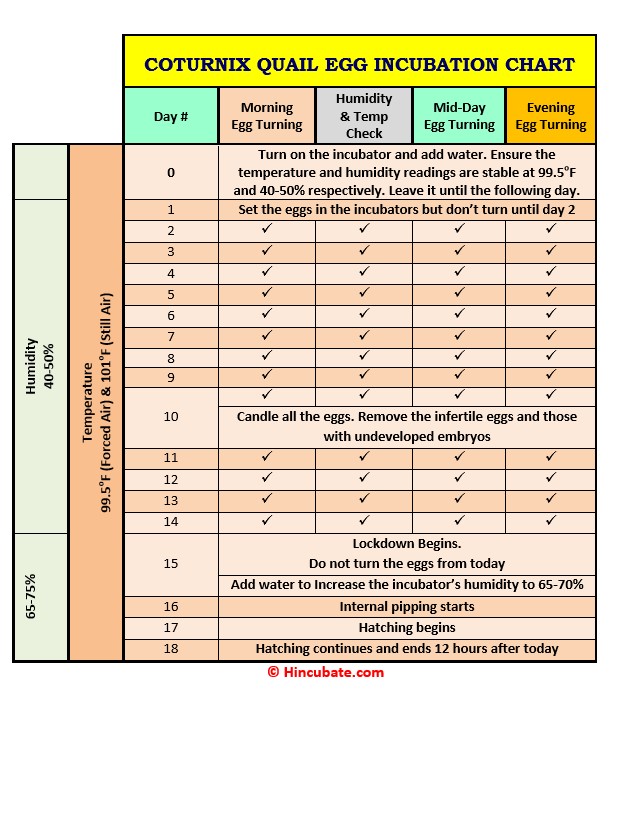
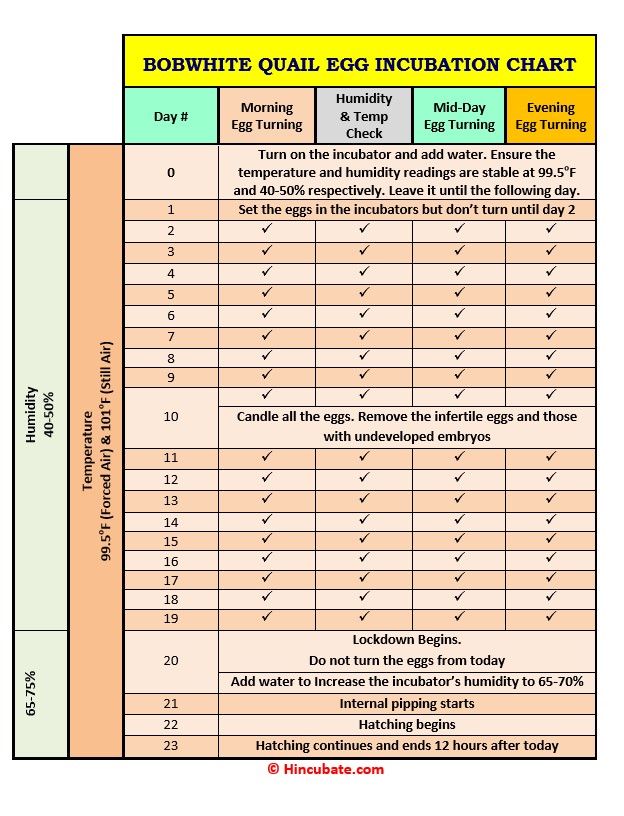
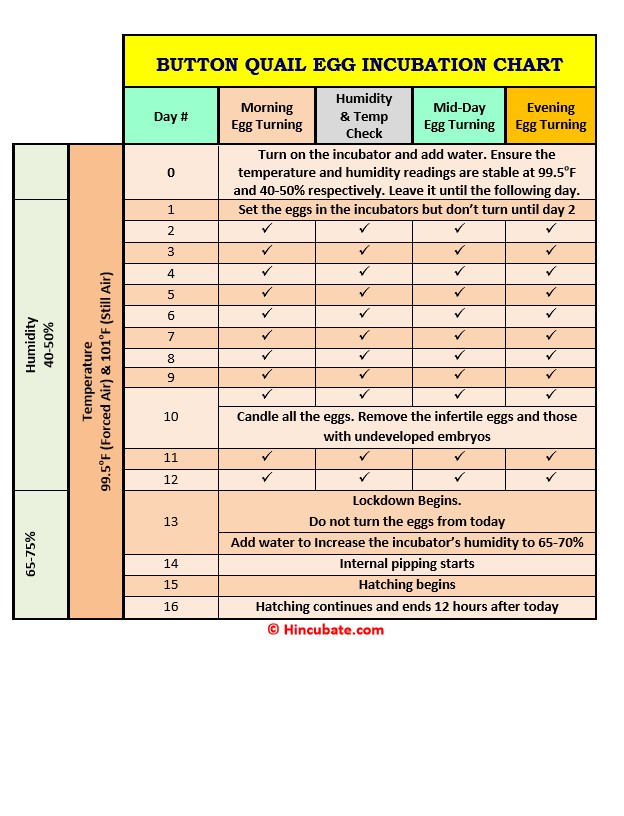
To ensure proper development, quail eggs must be turned frequently during incubation until three (3) days to hatching. For instance, Coturnix quail eggs must be turned from day 1 to 14 of incubation. Bobwhite quail eggs must be turned from day 1 to 19 of incubation. If your incubator does not have an automatic egg turner, you will need to turn the eggs with your hands. Eggs should be turned 3-5 times daily (approximately once every 8 hours). Be sure to check the (–) and (+) markings on the eggs to ensure the eggs are being properly turned.
Monitor the humidity and temperature levels. The ideal temperature is 99.5oF (37.5oC) and the humidity should be 45%. Always add water to the water reservoir as needed to maintain the correct humidity level. You can re-candle the eggs on day 10 to see if the embryos are developing. Remove any eggs that appear clear, as this indicates dead embryos.
Step 5: Stop turning the eggs and increase the relative humidity
When it is three days before hatching, egg turning must stop. Switch off the egg turning function on your incubator or stop turning the quail eggs by hand. This gives the baby quails time to get settled and develop fully before hatching. You should also increase the humidity to 65-75% until the eggs hatch.
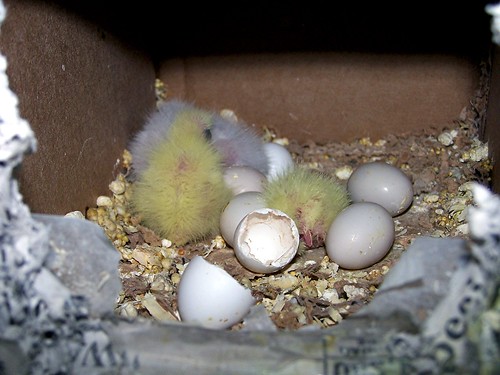
Step 6: Hatch day
Quail chicks generally hatch quickly and without much trouble. They typically begin pipping – the process of breaking through the eggshell – and emerge from the egg within a short period. It’s advisable to remove all dry, hatched chicks from the incubator every 24 hours after the first quail has hatched. The humidity can increase when many chicks hatch at once, making them wet.
Step 7: Clean and disinfect the quail egg incubator
Once all the quail chicks have hatched and been moved to their new home, it is important to clean and disinfect the incubator and all parts according to the manufacturer’s instructions. This will help to prevent the spread of disease.
Quail Egg Incubation Chart
These quail egg incubation charts have been designed for anyone who wants to hatch their quail eggs at home. This incubation chart shows the ideal temperature, humidity, and turning frequency for each day of the quail egg incubation period. It also includes some tips and reminders for a successful hatch. You can download the chart as a PDF file or print it.